The Fab Academy 2014
Digital Fabrication Laboratory. Department of Architecture.
Institute of Technology. EPS-CEU San Pablo CEU University
Adolfo Gutiérrez Sánchez
Architect
The Fab Academy 2014 Digital Fabrication Laboratory. Department of Architecture. Institute of Technology. EPS-CEU San Pablo CEU University |
Adolfo Gutiérrez Sánchez Architect |
|||
| Home | Portfolio | Files | ||
| EMBEDDED PROGRAMMING |
|
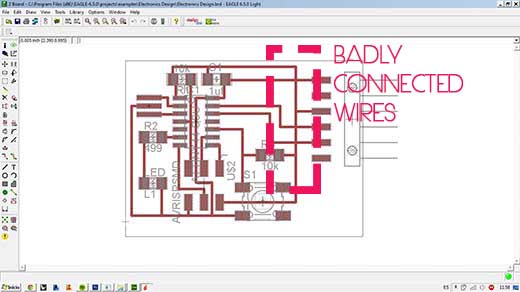
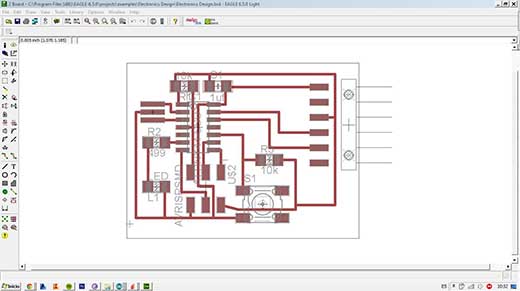
The assignment The assignment for this week was to learn how to program a board with a chosen language. The board should be programmed with the programmer done in the assignment of ELECTRONICS PRODUCTION and the board to program will be the one done in the ELECTRONICS DESIGN assignment. I noticed that my board done in electronics design was not built correctly, so I had to redo it completely as I had some bad connections between some components. That was the first thing that I had to redo for this week. The error was pretty simple and at first sight after I noticed that there was an error I realized that I moved the component but I did not move the wire with it and it overlapped the other wires on its way.
|
Downloading the software Once I corrected mt errors from the last two weeks, I started to download the necessary files in order to start programming my board. The tutorial that I followed was the one done by Anna Kaziunas. The best and easiest way to start programming (as I am a begginer in this field) is actually to run the Arduino software, as it has been designed to be used by normal people and not only programmers. The necessary software to be downloaded is the following: - Arduino IDE.- it is a free and open source software. We can download it easily form the official site. - ATiny Board Files.- as we do not have an official Arduino board, we have to say the Arduino software that we are using another board that has not be preinstalled in the software. We can download those files in the following link. - FTDI Drivers.- if we have not used FTDI cables before, we have to install the drivers in order to be recognised by our computer. We can check the avalability of drivers depending on our operating system here. |
 |
Programming with ATiny board The first step before mounting the program to our ATiny Board, is actually to set all the devices to be controlled by our computer. When we have donde that, we can start some tutorials with Arduino. Our first program with Arduino is going to be very easy as we just have one button to press and one LED to light. Firstly, we have to get comfortable qith Arduino enviroment and do some basic tutorials to understand how this software works. The desired program that I want to mount into the board will be: - Press one time the button: LED slow blink - Press second time the button: LED fast blink - Press third time the button: turn on LED - Press fouth time the button: turn off LED - ... |
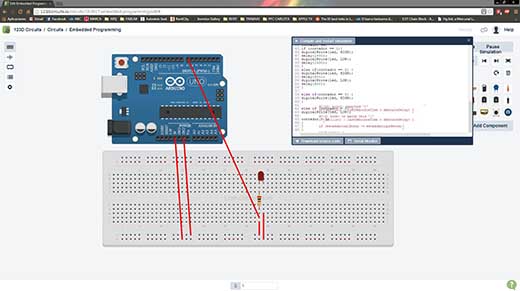
Programming with Arduino Starting from a tutorial named "Blink", we can start playing with the commands and try to mount the program into the board to see if it is doing what expeceted. This week I could not finish my programming because I could not make the board work and we had no components left to replace, so I kept working on the software 123D circuits with the same circuit that I had on my board. The idea was not to loose the practice of programming. I wrote the code in the arduino software and made sure that it was working compiling and correcting all the errors that I had. Done that I copied it into the 123D circuits. Here we can see the code that I copied: |
 |
/* int estadoLED = LOW; long lastDebounceTime = 0; int contador = 0; // the setup routine runs once when you press reset: } |
|
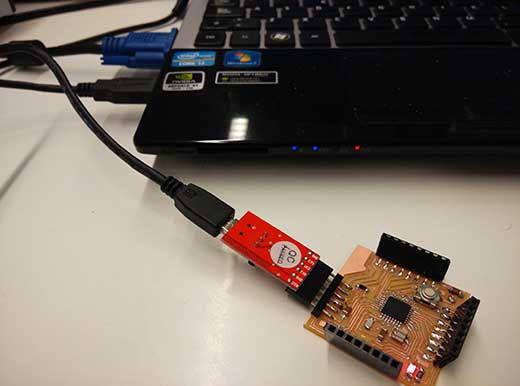
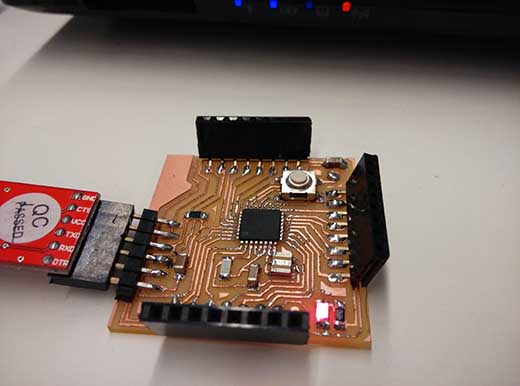
FabDuino To have my own Arduino board, I followed the instructions of the tutorials to build my own FabDuino. Along the course, I have used it for many purposes and is the main board of my final project design. The good thing about this board, that I found very useful, is that it can be programmed directly with the FTDI cable instead of using the FabISP programmer. The only time that I will need to use the FabISP programmer will be when I set the bootloader for the first time in my FabDuino, all the rest times I will just need the FTDI cable. To test my new FabDuino, I will just set a simple program (Blink, from the examples folder) to see if it is working properly. This is the code that I put into the Arduino board: /* // the setup routine runs once when you press reset: // the loop routine runs over and over again forever:
Programming Problems I was not able to accomplish the LED BOARD, as I broke one of the components before taking the pictures, but I was able to program my FabDuino with the code that I was thinking of programming the LED Board. These are the images that proof the succesful result.
|
|
|
 |